Twiddling my thumbs!

Twiddling my thumbs!
Just twiddling my thumbs!

Sunday, January 19, 2014

Workmates

I'm very fond of the Workmate portable workbench, I own three of them. I was skeptical of them right up to the moment I put my hands on one and gave it a shake. I was an instant convert. My first one was bought new for full retail as an effort to buy something worthwhile with some birthday money.  The second one was free, found abandoned and given a new home.  The third one I bought at a garage sale and was a bit of a disappointment; it's about an inch taller than the other two. WTF Black & Decker?  It's a newer model but I never would have believed changing that basic dimension.
The bad news is that they have parts that wear out; the good news is that you can still buy replacement parts. 
So...in my infinite spare time I have finally gotten around to installing the replacement parts!

Over here we have the newer unit supporting the one
being worked on. Since the new one is a different height than the other two, it has been moved to the house to serve for home-based projects. One of the accessories I have made is a table top that can be clamped into the Workmate, it's surprisingly sturdy.
 This is the one I bought new for full retail many years ago.  It was stored next to the catbox for many years.  One of the reasons it has taken me so long to fixing it is me not wanting to deal with the damage I caused a good tool by my neglect.


A little elbow grease, a wire brush, and some paint!  Almost new!

New parts installed!  Self imposed guilt trip eliminated!  Pigs airborne!

Saturday, November 2, 2013

So I got busy...

I had open heart surgery last December and I'm suppose to be exercising. Walking lasts until the feet give out so I pulled out this old rowing machine that Bill (of Billlls Idle Mind ) gave me many years ago and started using that. Soon I discovered that I wished to track my progress and found many apps for my phone that will do that. So the problem is how to glom the phone onto the rowing machine in such a way that the phone can be taken off and put on with relative ease. Enter the packrat; in the vast reaches of my shop I have several types of these
cellphone holders and one of them kinda sorta works on my phone. {{Warning! Actually using something you kept because it was cool and you never know whether you might need it justifies the packrat urge to keep more stuff. Just so you know.}}
Anyway, there are four convenient mounting points on the back so all I have to do is come up with a bracket of some kind to put it on the "T" of the rowing machine. There are an amazing number of possibilities at this point, so some filtering is necessary. A) I'm not completely committed to this

exercise thing; so don't spend a lot of time on something I "might" use.  B) If I do start using it regularly, I going to need to do some rebuild/upgrade  work on some parts of it, creating an opportunity to revisit the mount based on experience. C) There is no "C", quick & dirty it is!
A further look through the shop finds a small pile of zip ties, and the light goes on!
Drill some holes in a piece of aluminum angle; the one on the far upper left is counter bored because one of the screws is too short.

A little bandsaw time...
...and some zip ties, and we're done.
The zip ties were too short, so I had to string them together.
There it is, ready for action. I've used it like this three times so far. The mount works fine and I'm sorting out how to use the software.
While I was at it, I made a hook for the bathroom door.  This was a scrap piece, the end was already formed and drilled, I just sanded it smooth and bent the s**t out of it!

Sunday, October 27, 2013

It's been a busy month!

I had a Critter Crunch, the first and longest running robot fighting contest, to get ready for and run. Paying work started coming in at a pretty good clip. Every time I finish something it's " I should have taken pictures and posted this to my blog!". I've never been good at the documentation side of things; a fact that gives some people worry because most of the important stuff in my business exists only in my head.  The blog is supposed to be an exercise in documentation. I'm guessing that means more ofter than once a month.

Sunday, September 29, 2013

World's most expensive shelves, Part 3

 The problem with projects is that they begat more projects. I'm looking at the angle iron uprights for the shelves, and I'm looking at the floor in the various proposed locations for the completed unit and decide that some feet are required.
I salvaged these plastic blocks when one of my neighbors moved, he built bird habitats.
A little measuring, a Bridgeport, and an 1/8 inch end mill and I have eight of these.  Cut between the lines and I have sixteen feet.

Thursday, August 8, 2013

Dvorak Keyboards

About a million years ago, in high school, I took a typing class. Being one of those people that read for pleasure, I read the intro in the typing textbook. There I found a short, but surprisingly thorough, history of the typewriter. The QWERTY layout was designed to slow down the typist in order to prevent the mechanism from jamming. Dvorak was among the layouts that were going for speed and efficiency.  Unfortunately the technology was not up to the task and QWERTY became the default standard.
I've always wanted to learn Dvorak, but I've always had to share a computer until about five or so years ago.  I had picked up a copy of "Mavis Beacon Teaches Typing, 5", which is the last version to feature Dvorak, so all I needed was a keyboard.

The first one was the simplest to achieve; take the keys off of an old keyboard and rearrange as needed.  Two problems with this approach; the keys are molded in a way that improves the interface, but when you rearrange them you get weird angles. I could deal with that. The second problem was specific to my long ago broken wrist; trying to hold my hands in a correct typing position would cause excruciating pain after a couple of minutes.


 I moved on to the ergonomic board.
I got this board used for five bucks and figured I would pop the keys and rearrange as before, BUT, the keys would break instead of come out so the simple conversion became more complex. Steampunk keyboards were hot stuff at the time so I thought that's what I would make this one into.
 These are Lego axles that I was testing as a base for a key replacement.
This project will probably never move forward. I would have to manufacture each individual key. I could do this, but the desire isn't there. Steampunk has gone mainstream-ish and it just wouldn't be as cool a thing anymore.


 Anyway, I still needed a keyboard. I think I paid $12 for this one. Then I bought some good quality stickers. This is the better way of converting.  The letters are printed on the underside of a lexan sheet so they don't wear off and if you take some time and clean the key tops thoroughly the stickers are essentially permanent.


I had to do a little trimming on the home keys.

t
Eventually, Ol' Sticky started failing and I had to replace her. I bought this beast brand new with a pack of stickers. Only the stickers wouldn't fit.

Because the board itself has so many adjustments, I wondered if the keys were all alike. They mostly were so I could rearrange them to my hearts delight.
Except for the home keys; they had an extra something on them that prevented them from being moved to another position. Clever monkey that I am, I figured out what was different and performed surgery on the home keys. a little spot of JB Weld on the new home keys and here we are!

Thursday, August 1, 2013

The World's Most Expensive Shelves, Part 2

Painting is probably the thing I am worst at. The thing is; I've already got a lot of time invested in this project so it doesn't make sense to not paint them. I managed to keep the overspray mostly under control. I indulged myself with the purchase of a cheap handle that lets you use a spray can like a spray gun; worthy investment.

Thursday, July 25, 2013

Probable new project

What you see here is the nifty new/old dust collector I got at an auction. Generally I get sad at auctions and this one was no exception. All of some guy's stuff laid out on display.
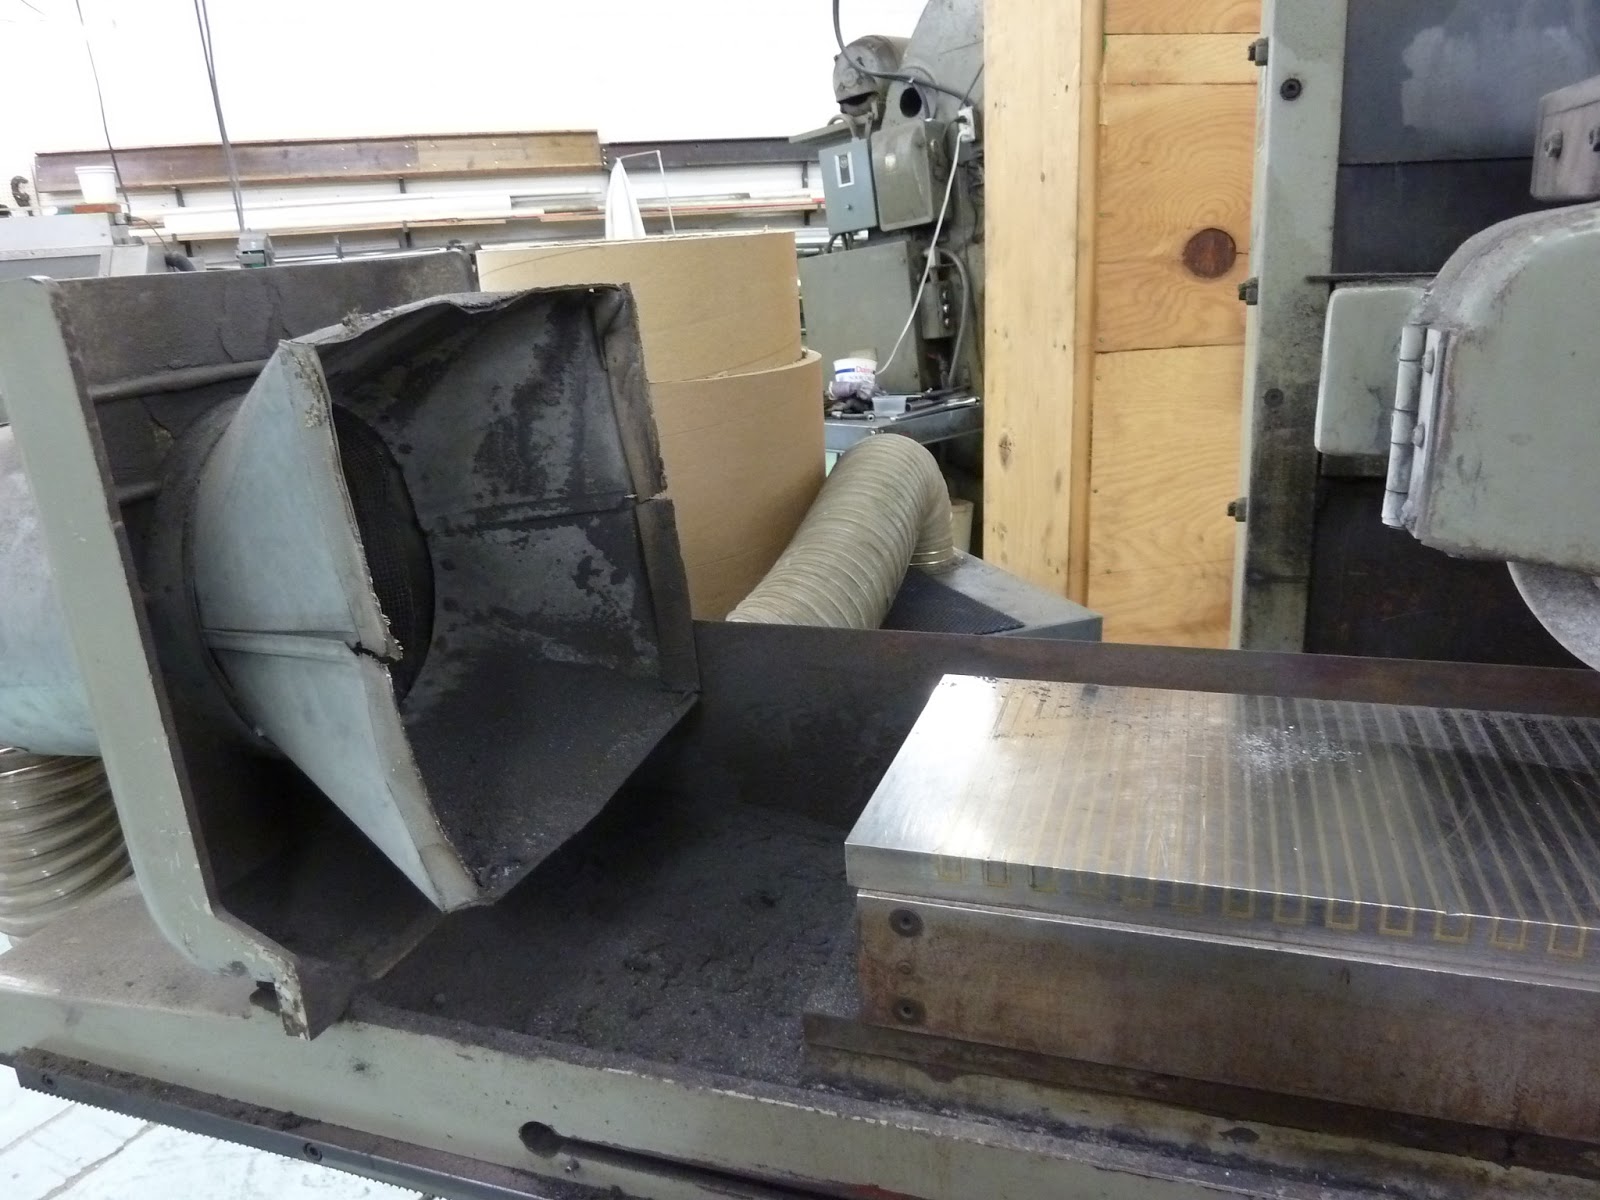
Anyway, I needed this kind of dust collector because the grinder generates sparks and all sorts of interesting things can come from sparks.  As you can see, it's connected to a funnel-like object that is suppose to suck all the dust in.


 Sometimes it's close to the wheel...
 ...and sometimes it's a bit farther away.


Now it's making sparks all the time, near and far, so it seems to me that there might be a more efficient way to do this.
 There's this convenient mounting point right here next to the wheel.
After I sawed out the broken area, this fitting might be a good basis for a dust collector end.
So now I let it percolate in my pea brain until I can get a better idea of what it's suppose to look like.

This is how projects start; sometimes they don't get finished.